
Between digital sketching and prototyping a new project we always build a physical mockup to test our concept in the real world.
Before we start building the mockup we talk a lot about how many features we can and should cram into it. It doesn’t necessarily need to be functionally limited, but it’s a tightrope between not spending too much time and money on the mockup while building a mockup that communicates itself to the audience.
We believe we recently outdid ourselves in the art of building a mockup, when we should demonstrate a hedge trimmer we’re currently working on:
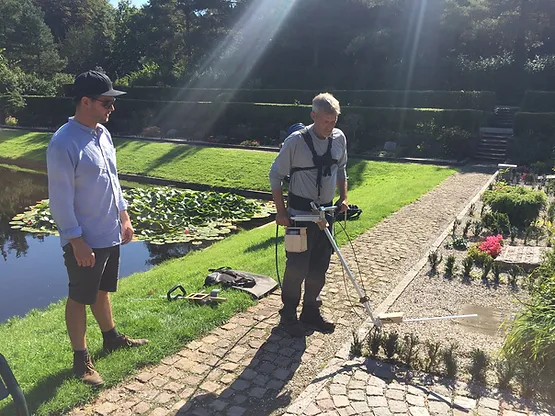
Yeah, it’s still a diamond in disguise, a roughly made mockup, but we’re proud of all its functions. Thanks to 3d printing and some brake cables from a bike, we’ve cramed a lot of functions into it.
How we build the physical mockup
The hedge trimmer is a project we’ve made with Copenhagen Municipality. The task was to make a tool which would allow cemetery gardeners to cut low hedges in an ergonomic responsible way.
We made a few concepts, and the slickest and most promising one had a lot of functions in a very limited space and it needed some fine motor operation. So a little nervously we went on to turning the digital model into a physical mockup.
The first step was to figure out what we wanted to demonstrate and test with the mockup. Figure out which functions are the most important to complete that task and then keep our eye on that target during the building process; The hedge trimmer’s blade should be able to angle and rotate, it should be height adjustable, and the carrying system should be adjustable as well.
We achieved the mobility in the blade by 3d printing a piece of plastic – the heart of the mockup – which allows motion:

In order to get it moving, we needed to ad wiring. In practice we bought some bike components from a local store and got them to interact with our 3d printed component. And to get the weight of the mockup just right – it was important if we wanted to demonstrate the adjustable carrying system in an honest matter – we 3d printed parts with room for steel weights to make it heavier.
Using 3d printed- and bike parts we did the mockup – alongside a similar mockup for a different hedge trimmer-concept – in only a few days with just a tiny tradeoff: It can’t actually cut anything.
A crucial part of the design process
It caused us some frustration, that we weren’t able to get the mockup to cut. But we had to give it up in order to verify the rest of the functions – which was the most important task.
Even without cutting any hedges the mockup communicated itself: With the mockup in hand the gardeners understood it immediately, and it made it easier for them to choose between the two different mockups we made. It would have been harder to pick one over the other, if we didn’t demonstrate how the concepts work in reality.
Picking the right one was essential before the next step in the process: a full blown prototype of the hedge trimmer, in the right materials and with all the functions – including cutting. We could have skipped the mockups and jumped straight into prototyping, but we might have ended up with an expensive prototype that eventually failed a marked test – and then have to start over.
The goal of the mockup is to make a quick and cheap demonstration of the most important features. Which means: Build it by materials available to you – like the ones we found in a bike store and 3d printed for the mockups of our hedge trimmer.
Hustle your way to a solution – even if it’s not exactly textbook-construction – so you can fail fast, improve and move on.